Archive for the ‘Cooking’ Category
Kitchen Experiment: Matzo Ball Soup
Posted on: April 5, 2010
- In: Cooking | Personal
- Leave a Comment
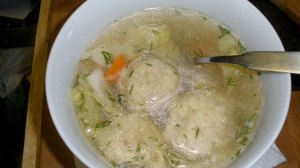
Unfortunately, I’ve recently come down with what I thought was a cold. I’ve been congested, coughing, sneezing and wheezing for a while and thanks to my great doctor, I’m finally getting better. What’s even worse is that my mom was sick too with this same bug, only it hit her much harder with aches and pains. The only thing I wanted to do was just stay in bed and sleep! I knew though that we both had to drink plenty of liquids and get as much rest as possible. I decided to make some chicken soup, since it’s the best home remedy ever. After two days of eating this soup, I wanted a variation so I decided to try my hand at making matzoh ball soup. Maybe I was inspired by the Passover holiday? Maybe I wanted some more substance to my soup? I don’t know what sparked this in me, but it was a great idea! The matzoh balls were easier to make than I thought and filled me with warmth and comfort since they were cooked in a delicious chicken broth. This recipe is super simple and easy to make. If you don’t like the matzoh balls, try adding some thin noodles to the soup, because, you know, chicken noodle soup is great too! This soup is just what you’ll crave when you’re feeling sick and it’s easy enough to make when you just want to stay in bed most of the day.
Kitchen Experiment: Matzoh Ball Soup
Yield: approximately 4 quarts
- 1 large Spanish onion, diced
- 4-5 carrots, peeled and diced
- 3-4 stalks of celery, diced
- 15-20 black peppercorns
- 2 bay leaves
- 1-2 teaspoons dried thyme
- 8-10 stems of fresh parsley
- 3-4 stems of fresh dill
- 1 chicken, preferably organic
- 1 box matzo meal
- 2 large eggs
- 2 tablespoons vegetable oil (I used canola)
- 1 teaspoon salt
- 1 tablespoons chicken broth
- 1/2 head cabbage, thinly sliced
- Dice your onion, carrots and celery. You should have about twice as much diced onion as you do of diced carrots and celery combined. If not, then add more of whatever you need to achieve this ratio of 2 parts onion to 1 part carrot and celery.
- Prepare your sachet. In a piece of cheesecloth (if you don’t have any you can always use gauze that doesn’t have any elastic) place the peppercorns, bay leaves, thyme, parsley and dill. Tie your sachet so that all your herbs are secure.
- Prepare your chicken. Remove the gizzards and cut off any excess fat along the tail. Rinse the chicken until the water runs clear, taking care to remove any internal organs that remain.
- In a large 6 quart pot over low, add your onion, carrots and celery and add the chicken. (If you like the gizzards and neck, do add them! I did and they gave a wonderful richness to the soup.)
- Add enough water to the pot to cover the vegetables and the chicken and add your sachet.
- Now walk away! Do not stir, turn or disturb this pot! Also, be sure you never have a rolling boil. If you do see vigorous boiling about to occur, reduce your heat. Come back in about 40 min (or an hour) and you will see some foam rising to the top. Gently skim this from the top without disturbing the rest of the contents.
- Repeat the skimming process every 30 minutes or so for the next hour.
- Meanwhile, prepare the matzo balls. In a large bowl, beat together the eggs, oil, salt and matzo meal. Add broth (I used broth from the pot) and mix until uniform. Refrigerate for about 30 minutes.
- At this point your soup has been gently simmering away for about 2 hours. Remove your chicken, taking care to retrieve any parts that might be falling off. Shred all the meat of your chicken and return it to the pot.
- Add the cabbage and cook until tender. (If you’re using noodles, add them at this point and cook until tender.) If you’re preparing the matzo balls, remove them from the refrigerator and form them into balls. Be aware that they will swell when cooking!
- Into a smaller pot, ladle enough broth so that it will cover the matzo balls. Cover the pot and bring the broth to a boil.
- Add the matzo balls and cook for about 30 minutes.
- To serve, ladle soup and 2 matzo balls into a large bowl. Top with some freshly chopped dill.
This soup is delicious and satisfying! For those or you more familiar with matzo ball soup, this recipe for the matzo balls are basically the recipe on the back of the box only I cooked them in broth instead of water. Of course, I have no idea if these are considered hard or soft and I wasn’t even aware of this debate until recently. I just know my soup was good and easy enough to make when I felt super sick!
- In: Cooking | Personal
- Leave a Comment
On these cold winter nights, it’s great to have something warm and delicious! Since I had a lot of veggies in the fridge, I decided to try my hand at a roasted vegetable stock. Roasting the veggies would warm up my kitchen and the stock would help me make a soup to warm me up at night. I also used mushrooms to make the stock have a richer flavor and deeper color.
Kitchen Experiment: Roasted Vegetable Stock
Yield: approximately 3-4 quarts
- 2 onions, roughly chopped
- 3 carrots, peeled and roughly chopped
- 3 celery stalks, roughly chopped (include green leaves if any)
- 2 parsnips, peeled and roughly chopped
- 1 portabello mushroom cap, sliced
- 4 large button mushrooms, sliced
- 1 head of garlic, cut into pieces
- 1/4 cup olive oil
- 1/4 cup white wine or other alcohol (I used calvados)
- parsley stems
- 1 tablespoon dried thyme leaves
- 2 bay leaves
- 14-20 black peppercorns
- Pre-heat oven to 400 degrees.
- Place all vegetables on baking sheet and toss with olive oil to coat.
- roast in oven for 45-60 minutes, until parsnips are tender.
- Pour 1/4 cup calvados over vegetables and stir in pan to remove anything stuck to the pan.
- Transfer vegetables to large stock pot and add 4-6 quarts of water.
- Add 1 large bunch of parsley stems, thyme and bay leaves.
- Bring to a boil and reduce to a simmer. Simmer for 1 to 1 1/2 hours.
- Strain stock through a cheese-clothed lined colander. Be sure to press on the vegetables to extract as much juice as possible.
So what am I going to do with this stock? Cold winter nights are perfect for hearty soups, so I’m using the stock to make a velvety pumpkin soup!
Ingredients:
- 1 tablespoon olive oil
- 1 bunch green onions, chopped (I used both the green and white parts.)
- 1 onion, diced
- 1 clove garlic, minced
- 2 (15 ounce) cans pumpkin puree
- 1-2 quarts vegetable stock
- 1 cinnamon stick
- pinch nutmeg
- salt, to taste
- white pepper, to taste
- 1 tablespoon freshly grated ginger
- In a large pot over medium heat, add olive oil.
- Add onions and cook until softened, about 5 minutes.
- Add garlic and cook 1 minute more.
- Add pumpkin puree and vegetable stock.
- Add cinnamon stick, nutmeg, salt, pepper and ginger. Bring to a boil and reduce to a simmer. Simmer for 30 minutes, until thickened and warmed through. If it’s too thick, thin it out with some vegetable stock or water. To serve, ladle into a warm bowl and either top with croutons or minced chives.
Thanksgiving Round-Up
Posted on: November 28, 2009
- In: Baking | Cooking | Personal
- 3 Comments
So this year I was responsible for the Thanksgiving dinner. My dad went to my brother’s house, so it was just me & my mom. At first I figured this would be fine and manageable and very low-key. Then my dad suggested we invite my grandma, aunt, her boyfriend and my cousin. We did. They came. I cooked. And we all ate!
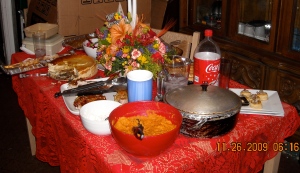
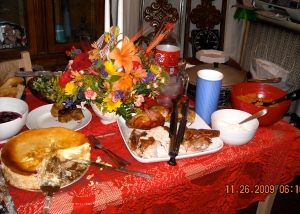
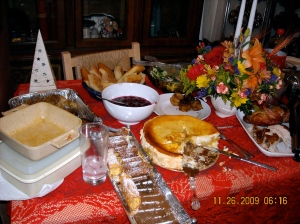
Of course, I was in such a frenzy that I forgot to take pictures! Any photos here were taken by my mom who had the foresight to snap a few shots at least! I am frustrated that I didn’t take my own shots since it was my first t-day dinner and well, it was the first time really cooking for my family. A part of me thinks that I was only allowed to do this because I just finished culinary school. A part of me also thinks they were all glad someone wanted to take on all the work. I say this mostly because they were all surprised I made everything. There was no canned cranberry sauce. No pre-made dinner rolls. Not even bottled salad dressing. OK, I did use broth in lieu of making my own stock, but even I realized I had to draw the line somewhere. I was aiming for everything to be ready & on the table by 3pm but I was about an hour late. No worries though as it was all a hit!
To start, I made a butternut squash soup. I used my crock pot to keep it warm. Since I made it the night before, I just took it out of the fridge a few hours before dinner and warmed it up in the crock pot. I also made mushroom cream vols-au-vents. And yes, I did make the puff pastry myself! I did try to buy it but the stores told me they only had that at certain times of year and this time of year they tend to have pie dough. Grrr…it’s ok though since home-made it’s SO much better! There was also a fennel-spinach-orange salad and fresh rosemary focaccia bread.
Of course, I made a turkey which I prepared the night before. I prepared it very simply with herbs, butter, salt and pepper and stuffed it with onion, carrot, leeks, a half a lemon and an apple. I find that stuffing it infuses nice flavor throughout the entire bird. I just kept an eye on it to keep it from burning and allowed it to rest before carving.
My mom made arroz con gandules which is rice with pigeon peas and she made her awesome sausage-chestnut stuffing. My grandma brought pasteles and piononos, which are basically fried sweet plantains stuffed with meat. I made mashed sweet potatoes which I kept warm in the small crock pot. I also made a fresh cranberry sauce as well as a fresh gravy. Dessert was pumpkin cheesecake, pumpkin cannoli, apple pie and fresh whipped cream. I made the cannoli, pie and cheesecake the night before and just whipped the cream as I was filling the cannoli before serving. Overall, it was a ton of work but it was all delicious! I was glad to spend time with my family and show them that I can cook a kick-ass meal! I hope they won’t ever eat canned cranberry sauce again! Here’s a few shots my mom managed to get of the food before it was all gone! (Note: The bird photos are by my cousin, Bryan Vargas of Ya Esta Musica. He hapily obliged as he was munching on crispy turkey skin!)
Last weekend, I managed to find one farm in Upstate New York where they were still open for apple picking! It was the first time I ever went and it was great! It was a nice day–sunny and not too chilly. My boyfriend & I came home with a huge bag each of a variety of apples. We brought back golden delicious, granny smith macintosh, red delicious and some other varieties I had only seen in the farmer’s markets. Of course I also had to get some sugar pumpkins so that I could try my hand at some new pumpkin recipes.
Of course, my first thoughts of things to do with the apples were apple pie and apple turnovers. But I thought I’d try something different so I decided to make some apple butter. If you’ve never had apple butter, I highly recommend it! It’s sweet & tart and delicious. It’s like an apple jam that’s a great accompaniment to toast, a bagel or even on the side of some pancakes. My recipe is a bit different though since I also added dried cranberries for some extra tartness. I also cooked this in my slow cooker so it was really easy. If any of you try this, let me know what you think!
Apple-Cranberry Butter Yield: 64 ounces
Ingredients:
- 5 1/2 to 6 pounds apples, peeled, cored and chopped (I used a variety of macintosh, granny smith and red delicious.)
- 6 ounces dried cranberries
- 1 1/2 teaspoon ground cinnamon
- 1/4 teaspoon clove
- 1/4 teaspoon salt
- 1/4 cup maple syrup
- 1/4 cup brown sugar
- 1/4 teaspoon nutmeg
- 1/4 teaspoon allspice
- In the bowl of your slow cooker or crock pot, (mine was 5 quart, but a bigger one would probably be better) add apples, cranberries, cinnamon, clover, salt, syrup, sugar, nutmeg, and allspice. (If all the apples don’t fit, just add as many as you can with the seasonings then add more as they cook down.)
- Stir to combine.
- Place slow cooker on low for 8-10 hours, until all the apples are cooked down and thickened.
- Use an immersion blender to remove any remaining lumps. Or you can also do process it in your food processor or blender, in batches.
- You can preserve these in cans so you can have apple butter throughout the winter or you can also freeze it to store it.
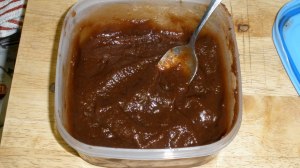
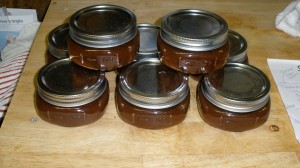
Pumpkin Butter Yield: about 20 ounces
Pumpkin butter, like apple butter is sweet and delicious! It’s a great way to use up any pumpkin puree you may have or even some sugar pumpkins you just got from the pumpkin patch! I used the pumpkins I bought from the farm’s shop when I went apple picking.
- 1 medium-sized sugar pumpkin, seeds removed or about 4 cups of pumpkin puree
- 1 inch fresh ginger, grated
- 3/4 cup brown sugar
- 1/2 cup maple syrup
- 1 teaspoon cinnamon
- 1/2 teaspoon nutmeg
- 1/2 teaspoon ground clove
- 1/4 cup bourbon (optional)
- 1/2 cup apple cider
- pinch salt
- Pre-heat oven to 350 degrees.
- Slice pumpkin in half. Remove seeds and membranes from pumpkin. (Reserve seeds for roasting, if desired.)
- Place pumpkin halves in oven, flesh side down. Roast for 45 minutes or until fork tender. Cool.
- Scoop out pumpkin flesh and place in bowl of slow cooker.
- Add ginger, brown sugar, maple syrup, cinnamon, nutmeg, clove, apple cider, salt and bourbon.
- Stir all ingredients together to combine.
- Cook on low for 2 hours until thickened and reduced. The best way to store this would be to freeze it as pumpkin does not can well.
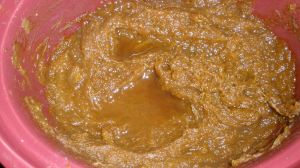
And what did I do with the rest of my pumpkin? Well I made a pumpkin cheesecake of course! I used a recipe from Pick-Your-Own and it turned out delicious! I will note however that I ended up with enough batter for two cheesecakes, which really isn’t too much of a problem once you taste this stuff! Also, be sure to bake it in a water bath. Please! And at a lower temperature–say about 300 degrees. I baked it without a water bath, at 350 degrees, and the tops cracked and the texture was a bit gritty. I think with gentler cooking both of these minor issues can be averted. I will definitely be trying this again soon, once the cakes are both gone. So far, I made this last night and as of today, one is already gone! It really is a great recipe!

- In: Cooking | Personal
- 2 Comments
I love the fall! Autumn has so many great foods that are so versatile and delicious. Of course summer fruits and vegetables are great too, but I just love the unique tastes that come from the different autumn foods. One of my favorites is the pumpkin which is delicious savory or sweet. I also love squash! I know, I know it’s weird. But squash is easy to make, delicious and versatile. The other day I came home with a shopping bag full of squash that I used to make soup. I also had the acorn squash as a simple side, roasted with butter, maple syrup and brown sugar. I then filled the squash with some cooked onions and pecans for texture. Of course with my different kitchen experiments, I tend to have to plan and shop for ingredients, but this time I wanted to re-use that delicious acorn squash to make ravioli. These ravioli were not easy to make, but they were delicious and hearty! I recommend taking some time one day to make some fresh ravioli–it will really change your world!
Yield about 28, 2 1/2 inch ravioli
To Make the Ravioli you need to start with 11 ounces of flour and 3 eggs. Make a well with the flour and beat the eggs into the well. Using a fork slowly incorporate the eggs into the flour until you’ve incorporated most of the eggs. Use a bench scraper to start kneading the dough. Once the dough has come together, wrap in plastic wrap and allow to rest for at least 30 minutes. After the dough has rested, cut it into four pieces using a bench scraper. Roll one piece of the dough until thin enough to pass through a pasta roller. Follow directions for your pasta machine to roll out the dough and use either a ravioli mold, a ravioli stamp to shape the ravioli. You can also cut them by hand.
Acorn squash ravioli filling Ingredients:
- 1 roasted acorn squash
- 1 tablespoons butter
- 2 tablespoons maple syrup
- 2 tablespoons brown sugar
- 1/2 sliced onion
- 1/3-1/2 cup chopped pecans
- 8 ounces ricotta cheese, strained
- 1/4 teaspoon nutmeg
- salt and pepper to taste
- 1/2 stick butter (2 ounces)
- 2 tablespoons fresh sage leaves, chopped
- 1/4 cup pecans, chopped
- Pre-heat your oven to 350 degrees. Slice the acorn squash in half and remove the seeds and membranes.
- Rub the butter along the inside of the squash and sprinkle the brown sugar inside. Add the maple syrup. Roast for 45 minutes to an hour, until fork tender. Allow to cool.
- Meanwhile, place ricotta cheese into a sieve, lined with cheese cloth and allow to strain. Squeeze to remove as much water as possible. Note, if your ricotta cheese is already very thick and creamy, you can probably skip this step.
- In a large pan, over medium heat, add liquid from squash and add onion and pecans. Cook until reduced and onions have softened, about 6 to 8 minutes.
- In the bowl of a food processor, scrape the acorn squash and add the onion and pecans. Add the strained ricotta cheese and pulse until combined.
- Fold in nutmeg, salt and pepper to taste.
- Place filling into a pastry bag to fill ravioli.
- Meanwhile, place a large pot of water to boil with salt.
- In a large pan, over medium heat melt butter. Once water is boiling add ravioli, working in batches of 8.
- With a spider or slotted spoon, remove ravioli and add to melted butter. Add sage leaves and pecans, and cook for 3-4 minutes more, until all ravioli are coated and sage is fragrant.
One thing that I’m able to do really well since culinary school is make a kick-ass pot of soup. I was able to make soups before, but they didn’t have the depth of flavor and rich texture that my soups have now. And, I’m able to adapt many soup recipes to a variety of different dietary needs. For example, if you want this soup to be vegetarian use water or vegetable stock instead of chicken stock or broth. If you want to make it vegan, substitute the butter for olive oil, taking care to ensure your oil doesn’t reach its smoke point. With the nip in the air today, I thought this soup would be perfect to warm me up and would still incorporate great autumn flavors.
Roasted Butternut Squash Yield: 6 to 8 (8 ounce) servings
Ingredients:
- 2 large butternut squash, peeled and chopped roughly, seeds removed
- 4 tablespoons olive oil
- salt and freshly ground pepper to taste
- 4 tablespoons butter
- 1/2 large onion, diced
- 1 carrot, peeled and diced
- 1 celery stalk, diced
- 2 ounces flour
- 40 ounces low-sodium chicken broth (you can substitute water or vegetable stock)
- 1 bay leaf
- salt and freshly ground white pepper
- 6 slices whole grain bread, cut into cubes
- 4 tablespoons butter
- 4 fresh sage leaves, minced
- Pre-heat the oven to 350 degrees. Place the butternut squash on a sheet pan and toss with olive oil, salt and pepper. Place in oven for 45 minutes to one hour, until tender. Remove from oven and reserve.
- In a large, deep pot, over medium-high heat, add butter onion, carrot and celery and cook until softened, about 5 or 6 minutes.
- Whisk in flour and cook 2 minutes more.
- Slowly whisk in stock or water.
- Add roasted squash, bay leaf, salt and white pepper. Bring to a boil over high heat, then reduce to a simmer. Stir occasionally to make sure nothing sticks. Simmer for about 10-15 minutes.
- Meanwhile, make the croutons. In a large pan over medium-high heat, melt the rest of the butter. Toss in the bread and the sage leaves until toasted. Season with salt and pepper and reserve.
- Once the squash has broken down, remove the pot from the stove and purée the soup in batches either in the food processor or blender. (You can also use a food mill with the medium plate.)
- Return the soup to a simmer and adjust seasoning, if necessary. To serve, ladle into a warmed bowl and top with 5-6 toasted croutons.
Vegetarian Cravings
Posted on: October 29, 2009
- In: Cooking | Personal
- Leave a Comment
For some strange reason, this past week, I have had absolutely NO desire to eat any meat at all. As a matter of fact, I’ve only wanted vegetables, cheeses, good crusty breads, and some pastas. This is very strange, but I’ll go with it. I wonder if it’s the colder weather making me crave hearty vegetables. Or if I’m finally feeling the need to detox from culinary school and all the rich and delicious food I had while I was there. Or maybe, I just want my pants to fit a bit better, since I have unfortunately, put on about 12 pounds during culinary school. Eep!
Those who know me know I love food. I think that swine, in all its forms is divine and freshly made pastas and pastries are like manna from heaven. But maybe, it’s time for a break and my new veggie cravings are my body’s way of telling me to just chill out for a bit! So in the spirit of veggie cravings, I bring you two recipes I’ve had that satisfied my new craving very much! I’m sure I’ll be having some meat again soon enough — my freezer is still well-stocked with some home made sausage I made as a part of my externship! But, until then, I’ll enjoy the beautiful vegetables in a hearty Ratatouille and Vegetarian Lasagna!
Autumn Ratatouille
This ratatouille is a hearty blend of eggplant, zucchini and tomatoes. It’s quick, so it’s great for a weeknight and it’s sure to warm you up on a cold night! Serve this with some warmed crusty bread and you’ve got a delicious and healthy meal! If you want to make it vegan, omit the cheese and instead top it with some chopped toasted pine nuts.
Ingredients:
- 1 tablespoon olive oil
- 1/2 large yellow onion, chopped
- 1 cup white mushrooms, sliced (You can also use cremini.)
- 1/2 large or one whole small eggplant, chopped
- 1 zucchini, quartered and chopped
- 1 red bell pepper, seeded and chopped
- 3 garlic cloves, grated or minced
- 2 tsp dried rosemary or 1 sprig fresh
- salt & freshly ground pepper to taste
- 2 tablespoons tomato paste
- 1 (28 ounce) can whole tomatoes
- 1/2 cup red lentils
- grated parmesan or romano cheese (optional
- 1/2 cup pine nuts, toasted and chopped
- hearty, crusty bread, sliced and toasted
- In a heavy-bottomed pot, over medium-high heat, heat the olive oil until it ripples.
- Add the onion and mushrooms and sweat for 5 to 6 minutes.
- Add the eggplant, zucchini, and bell pepper and cook until softened, about 5 minutes.
- If you have a microplane, grate the garlic right into the pot. If not, add the garlic, minced. Cook 1 minute more.
- Add the rosemary, salt and pepper and tomato paste. Cook for 2 minutes, until the tomato paste begins to caramelize.
- Add the whole tomatoes and break up with a wooden spoon. Cover and cook for 30 to 40 minutes until thick and reduced.
- In the meantime, toast the bread. If using the pine nuts, toast in the oven at 350 degrees for about 5-7 minutes. Cool and then roughly chop.
- Add the lentils and cook for another 15 to 20 minutes.
- To serve, ladle into a heated bowl and top with cheese or pine nuts. Serve with toasted bread.
Veggie Lasagna
The key to making sure this is delicious and rich is using fresh mozzarella. Although my batch came out a bit on the watery side, it was flavorful, rich and delicious. And since I used oven-ready lasagna noodles, this was quick enough for a weeknight meal.
Ingredients:
For the vegetables:
- 2 tablespoons olive oil
- 1/2 yellow onion, diced
- 1 cup sliced mushrooms
- 1 zucchini, diced
- 1 yellow squash, diced
- 1/2 large eggplant, diced
- 1 carrot, peeled and diced
- 2 cloves garlic, minced
- 1 teaspoon fennel seed
- 1/4 teaspoon crushed red pepper flakes
- 1 sprig fresh rosemary, chopped
- salt and freshly ground pepper to taste
- 1 box oven ready lasagna noodles
- In a large skillet, over medium heat, heat the olive oil.
- Add the onions and mushrooms and cook until softened, about 5 minutes.
- Add the zucchini, squash, eggplant, and carrot and cook until softened and the carrots are browned.
- Add the garlic, fennel seed, red pepper and rosemary and cook 2 minutes more. Season with salt and freshly ground pepper.
- Once the vegetables are softened, about 10 minutes, reserve.
For the sauce:
- 1 teaspoon olive oil
- 2 cloves garlic
- 1/2 cup red wine
- 1 (28 ounce) can San Marzano tomatoes
- In a large pot, over medium-high heat, heat the olive oil.
- Add the garlic and cook 2 minutes.
- Add the tomatoes and the wine. Cook until thick and reduced by about 1/3, breaking up the tomatoes with a wooden spoon.
For the cheese:
- 15 ounces ricotta cheese
- 1 egg
- 1/2 teaspoon red pepper flakes
- 2 bunches of spinach, washed and torn
- 1 ball of fresh mozzarella, diced
- In a deep bowl, place the ricotta cheese, egg, red pepper flakes and spinach.
- Mix thoroughly to combine and reserve.
To assemble:
- Pre-heat oven to 350 degrees. In a rectangular baking dish, add a spoonful of the sauce and spread it evenly.
- Add a layer of noodles, placing them close together.
- Add a layer of vegetables, spreading the vegetables evenly.
- Add a layer of sauce.
- Dollop half of the ricotta cheese mixture on top of the sauce and one third of the mozzarella. Add another layer of noodles.
- Add a layer of vegetables on top of the noodles.
- Add a layer of sauce.
- Dollop the remaining half of the ricotta cheese mixture on top of the sauce and one third of the mozzarella. Add another layer of noodles.
- Top with another layer of sauce and the rest of the mozzarella.
- Cover with aluminum foil and bake for 30 minutes. The cheese should be melted and the noodles cooked through. To serve, let the lasagna rest for 10 minutes after removing from the oven and slice.
Sorry for the lack of pictures but I was really hungry!
- In: Cooking | Personal
- Leave a Comment
With the nip in the air and all the rain we’ve been having lately, I’ve been craving a hearty meal. You know, the kind of meal where you feel filled, warmed and satisfied after eating it. The kind of meal where you’re not slaving away for hours, but your kitchen is definitely warm for a few hours after. So, I decided to make and easy, and fairly traditional, Shepherd’s Pie. Here’s my take on it.
Ingredients:
- 1 tablespoon butter
- 1/2 large onion, diced
- 1 cup sliced mushrooms (button or cremini or both)
- 2 cloves garlic, minced
- 2 sprigs rosemary, chopped finely
- 1 lb ground lamb
- 1 (14 ounce) can whole tomatoes
- 1 bay leaf
- 1 cup frozen peas and carrots
- salt and pepper to taste
- 3 potatoes, cut into 1-inch pieces
- 1/4 cup milk
- 4 tablespoons butter
- 1/2 – 3/4 cup plain bread crumbs (optional)
- 2 tablespoons butter (optional)
- Pre-heat the oven to 350F and butter a rectangular baking dish.
- In a large skillet, over medium heat, add butter and heat until it melts.
- Add onion and mushrooms and cook until soft and mushrooms have released most of their liquid, about 10-12 minutes.
- Add garlic and rosemary, and cook 1 minute more.
- Add lamb, breaking up as you cook it. Cook until it is brown.
- Add tomatoes and bay leaf and bring to a simmer. Cook until thick and reduced.
- Meanwhile, in a deep pot add potatoes and cover with cold water. Add salt and bring to a boil. Cook potatoes until tender, about 20 minutes, and drain.
- Transfer potatoes to a bowl and add milk and butter. With a masher or fork, smash potatoes, mixing in the butter and milk. Season to taste with salt and pepper. Reserve.
- Add peas and carrots to lamb mixture and cook 2 minutes more.
- Transfer lamb mixture to baking dish, spreading it out into an even layer.
- Top lamb with mashed potatoes mixture, spreading evenly.
- Sprinkle top with bread crumbs and dot with butter, if desired.
- Bake for 30 minutes or until top is browned.

Shepherd's Pie

Layers

Semi Devoured Shepherd's Pie
I recently made some fresh puff pastry. The last time I made this was during the pastry module while I was in culinary school. I was fascinated with how the layers would form just from folding some dough and wrapping it around butter. Seriously, whoever thought of this procedure is a pure genius and for me, he/she is right up there with Albert Einstein! Since I made the dough, I stored it in the freezer for another day. Yesterday happened to be the day when I decided to take it out and make something wonderful with that puff pastry: apple turnovers! Who doesn’t love warm, sweet apples nestled in layers of flaky dough? With a cup of coffee, this simple treat is a great way to start my morning!
Apple Turnovers Yield, 10 to 12 turnovers
Ingredients:
- 1 large sheet of puff pastry (Of course you can use your preferred brand of store bought puff pastry!)
- 3 Granny Smith apples, peeled, cored and diced
- 1 lemon, juiced and zested
- 1/2 cup brown sugar
- 1/2 tsp ground cinnamon
- 1/2 tsp salt
- 1/4 tsp ground nutmeg (freshly ground is best)
- 1/4 tsp ground cloves (optional, but if using freshly ground is best)
- 1 egg, beaten
- 1 cup confectioner’s sugar
- 1 tsp vanilla extract
- 3 T milk
-
Pre-heat oven to 350 degrees and line a baking sheet with parchment paper. In a medium bowl, add the apples, lemon juice, lemon zest, sugar, cinnamon salt, nutmeg, and cloves, if using. Set aside.
- On a lightly floured surface, roll out your puff pastry into a large sheet.

Puff pastry before rolling

Rolled out puff pastry
- Using a pizza cutter or very sharp knife, cut your puff pastry in half. Set one half aside. Cut the remaining half into 6 even rectangles.
- Fill each rectangle with about a tablespoon of the apple mixture, draining it of any juices that may have developed in the bowl.
- Brush the edges of the rectangle with beaten egg and fold the rectangle over, pressing lightly to remove any air. Use a fork to crimp together the edges.

- Place each turnover on a parchment-lined baking sheet and brush each with the beaten egg.
- Using a sharp knife, cut 2 or 3 slits in the top of each turnover, to create slits. These slits will serve as vents and will keep your pastries from exploding!

- Bake in a 350 degree oven for 40-45 minutes or until golden brown.

While your turnovers are cooling, you can make the icing!
- In the bowl of a mixer, combine confectioner’s sugar, vanilla extract and milk.
- Mix until it reaches a thick consistency, resembling icing. If you need to thin it out a bit, add a few drops of more milk.
- Using a spoon, drizzle the icing on top of your turnovers.

After spending the day surrounded by sweets, I decided I wanted something spicy for dinner, so I made some sausage chili.
Sausage Chili, Yield 4 to 6 servings
Ingredients:
- 2 T olive oil
- 1 onion, diced
- 4 links of hot italian sausage, casings removed
- 3 cloves garlic, minced
- 2 jalapeños, seeds and stems removed and diced
- 1/2 dried habañero, stems and seeds removed and minced
- 3/4 cup red wine or 1 bottle beer
- 2 T of cajun seasoning
- 2 T of chili powder
- 2 T of cumin
- 1 (1lb, 13 oz) can of pink beans
- 1 (28 oz) can of tomatoes
- Top with crumbled cotija cheese or cheddar
- Warm a stock pot or dutch oven to medium heat.
- Add olive oil.
- Once olive oil is heated, add onion and cook until soft and edges are brown, about 5 – 6 minutes.
- Add sausage. Crumble the sausage while cooking. Cook until browned through about 10 minutes.
- Add garlic, jalapeños and habañero and cook 2 minutes more.
- Add wine or beer and scrape the bottom of the pot to remove any bits that are stuck. Cook another 2 minutes until liquid is reduced.
- Add cajun seasoning, chili powder and cumin, stirring to incorporate. Cook another minute.
- Add beans and tomatoes.
- Simmer, covered, for about 20-30 minutes until thick.
- To serve, ladle into bowl and top with crumbled cotija or cheddar cheese
For some reason, I thought I had written about this. Maybe because I spent so much time telling everyone I know all about how this exam went! Of course, for the days approaching the exam we kept trying to guess the mystery protein. I even contacted some classmates I knew who worked setting up kitchens to see if they saw anything on the class pull sheet. (This is the list of ingredients that are sent to the classroom kitchens.) Of course, I was only told about the slab bacon. But really, how can you make an entree with just slab bacon?
Since I didn’t think this was really the mystery protein, I decided to do a little prep work. I researched a few recipes for proteins I haven’t cooked very often. I had a salmon recipe, a duck recipe and a lamb recipe ready. (I’m glad chef told us we were able to bring resources!) When I walked in to the school that day, I saw some classmates and right away, I knew it was duck!
Now, chef was really fair about how the exam was being run. We were given a start time and a presentation time. We were also told to draw a number, which corresponded with the start & presentation times. And to account for the fact that the people who were allowed to start a bit later would know the mystery protein, those who started earlier were given an additional 10-15 minutes. So, since I drew #4, I was given two hours and 10 minutes total to prepare an entree consisting of duck, a starch and a vegetable. I actually found I had way too much time!
The first thing I did was to fabricate the entire duck. We had to show her the carcass as well as the trimmed pieces of duck. This was actually very much like a chicken and I was done in about 10 minutes. Then it was time to really think about my meal.
Since chef had mentioned the use of a garnish, I started first by trying to make a few garnishes that I thought would go well with the duck. Since duck goes nicely with sweets, I candied some almonds as well as some fennel fronds. I basically just tossed the almonds in some egg whites and then coated them in sugar and baked them. I did the same with the fennel fronds. My first attempt at doing this resulted in burnt fennel fronds, so I tried again. My almonds though were yummy–nice and sweet and pretty!
Then I started to think about a starch. We had potatoes, arborio rice, basmati rice and polenta available to us. I decided to use the polenta. I prepared it simply by boiling it with chicken stock and adding some salt & pepper.
Once that was done, I started to think about a vegetable. I thought it might be cool to use the duck breasts, slice them open and make a stuffing. I sauteed some onion, garlic, carrot, fennel and spinach until they were all nice and tender. While doing that I was also preparing a sweet sauce consisting of a reduction of orange juice and honey. At first I thought I would glaze the duck breast with that sauce, but I decided to use it for the vegetables. Instead of a stuffing, I made a vegetable dressing.
My duck was prepared simply. I scored the fat so that I can get a nice crispy skin. Once I was done sauteeing it, I placed it in the oven to keep it warm. This is where I ran into a problem. I had left the duck in the oven a bit too long and so it became a bit overcooked. If I hadn’t been so hungry, I might have remembered to take a picture of the plate. But, I can describe it! I laid down some polenta and then topped it with my vegetable dressing. I topped the vegetable dressing with sliced duck breast and garnished with the candied almonds & fennel fronds. Chef loved the presentation, the use of savory & sweet flavors and the use of the garnishes. She commented that I used many Italian flavors, which I never realized I use a lot when I cook. My only problem: over cooked duck! Overall, I ended up with a 95 for my FINAL practical exam!
