Archive for November 2009
Thanksgiving Round-Up
Posted on: November 28, 2009
- In: Baking | Cooking | Personal
- 3 Comments
So this year I was responsible for the Thanksgiving dinner. My dad went to my brother’s house, so it was just me & my mom. At first I figured this would be fine and manageable and very low-key. Then my dad suggested we invite my grandma, aunt, her boyfriend and my cousin. We did. They came. I cooked. And we all ate!
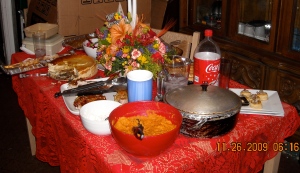
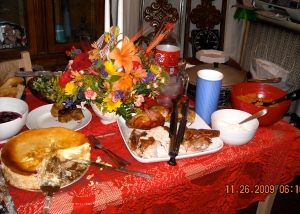
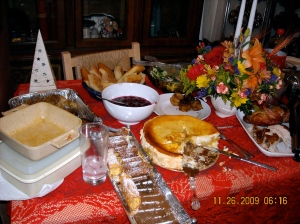
Of course, I was in such a frenzy that I forgot to take pictures! Any photos here were taken by my mom who had the foresight to snap a few shots at least! I am frustrated that I didn’t take my own shots since it was my first t-day dinner and well, it was the first time really cooking for my family. A part of me thinks that I was only allowed to do this because I just finished culinary school. A part of me also thinks they were all glad someone wanted to take on all the work. I say this mostly because they were all surprised I made everything. There was no canned cranberry sauce. No pre-made dinner rolls. Not even bottled salad dressing. OK, I did use broth in lieu of making my own stock, but even I realized I had to draw the line somewhere. I was aiming for everything to be ready & on the table by 3pm but I was about an hour late. No worries though as it was all a hit!
To start, I made a butternut squash soup. I used my crock pot to keep it warm. Since I made it the night before, I just took it out of the fridge a few hours before dinner and warmed it up in the crock pot. I also made mushroom cream vols-au-vents. And yes, I did make the puff pastry myself! I did try to buy it but the stores told me they only had that at certain times of year and this time of year they tend to have pie dough. Grrr…it’s ok though since home-made it’s SO much better! There was also a fennel-spinach-orange salad and fresh rosemary focaccia bread.
Of course, I made a turkey which I prepared the night before. I prepared it very simply with herbs, butter, salt and pepper and stuffed it with onion, carrot, leeks, a half a lemon and an apple. I find that stuffing it infuses nice flavor throughout the entire bird. I just kept an eye on it to keep it from burning and allowed it to rest before carving.
My mom made arroz con gandules which is rice with pigeon peas and she made her awesome sausage-chestnut stuffing. My grandma brought pasteles and piononos, which are basically fried sweet plantains stuffed with meat. I made mashed sweet potatoes which I kept warm in the small crock pot. I also made a fresh cranberry sauce as well as a fresh gravy. Dessert was pumpkin cheesecake, pumpkin cannoli, apple pie and fresh whipped cream. I made the cannoli, pie and cheesecake the night before and just whipped the cream as I was filling the cannoli before serving. Overall, it was a ton of work but it was all delicious! I was glad to spend time with my family and show them that I can cook a kick-ass meal! I hope they won’t ever eat canned cranberry sauce again! Here’s a few shots my mom managed to get of the food before it was all gone! (Note: The bird photos are by my cousin, Bryan Vargas of Ya Esta Musica. He hapily obliged as he was munching on crispy turkey skin!)
This month’s challenge was a lot of fun! I’ve bought cannoli for years, but never knew how to make them. Now, I can make some decent cannoli all on my own! I served my cannoli for Thanksgiving dessert this year and they were a big hit. They were filled with a pumpkin filling and I even made my own ricotta using this recipe. Overall, this was a great challenge and I loved participating in it! Here’s some shots of my pumpkin cannoli.
The November 2009 Daring Bakers Challenge was chosen and hosted by Lisa Michele of Parsley, Sage, Desserts and Line Drives. She chose the Italian Pastry, Cannolo (Cannoli is plural), using the cookbooks Lidia’s Italian-American Kitchen by Lidia Matticchio Bastianich and The Sopranos Family Cookbook by Allen Rucker; recipes by Michelle Scicolone, as ingredient/direction guides. She added her own modifications/changes, so the recipe is not 100% verbatim from either book.
Cannoli are known as Italian-American pastries, although the origin of cannoli dates back to Sicily, specifically Palermo, where it was prepared during Carnevale season, and according to lore, as a symbol of fertility. The cannoli is a fried, tube-shaped pastry shell (usually containing wine) filled with a creamy amalgamation of sweetened ricotta cheese, chocolate, candied fruit or zest, and sometimes nuts. Although not traditional, mascarpone cheese is also widely used, and in fact, makes for an even creamier filling when substituted for part of the ricotta, or by itself. However, cannoli can also be filled with pastry creams, mousses, whipped cream, ice cream etc. You could also add your choice of herbs, zests or spices to the dough, if desired. Marsala is the traditional wine used in cannoli dough, but any red or white wine will work fine, as it’s not only added for flavor or color, but to relax the gluten in the dough since it can be a stiff dough to work with. By the way, the name ‘Lidisano’ is a combination of Lidia, Lisa and Sopranos..LOL
Posting Date – November 27, 2009
Equipment:
Cannoli forms/tubes – optional, but recommended if making traditional shaped cannoli. Dried cannelloni pasta tubes work just as well!
Deep, heavy saucepan, enough to hold at least 2-3-inches of oil or deep fryer
Deep fat frying thermometer. although the bread cube or bit of dough test will work fine.
Metal tongs
Brass or wire skimmer OR large slotted spoon
Pastry bag with large star or plain tip, but a snipped ziplock bag, butter knife or teaspoon will work fine.
Cooling rack
Paper bags or paper towels
Pastry Brush
Cheesecloth
Sieve or fine wire mesh strainer
Electric Mixer, stand or hand, optional, as mixing the filling with a spoon is fine.
Food Processor or Stand Mixer – also optional, since you can make the dough by hand, although it takes more time.
Rolling pin and/or Pasta roller/machine
Pastry or cutting board
Round cutters – The dough can also be cut into squares and rolled around the cannoli tube prior to frying. If making a stacked cannoli, any shaped cutter is fine, as well as a sharp knife.
Mixing bowl and wooden spoon if mixing filling by hand
Plastic Wrap/Clingfilm
Tea towels or just cloth towels
Required: Must make cannoli dough and shells. If you don’t have or do not want to purchase cannoli forms, which I would never ask of any of you, you could simply cut out circles, squares, or any shapes you want and stack them with the filling of your choice to make stacked cannoli’s aka Cannolipoleons (directions below). If desired, you can channel MacGuyver and fashion something heat proof to get traditional shaped cannoli (6-8 inch sawed off lengths of a wooden broom stick or cane, sanded down and oiled, is THE authentic cannoli form!), or non-traditional shapes such as creating a form to make bowls, or even using cream horns if you happen to have them. Mini cannoli would be great too, and I’ve provided links to retailers of cannoli forms of all sizes.
Also, for those who don’t like to cook or bake with alcohol – grape juice, cranberry juice, pomegranate juice, apple juice..any sweet juice of a fruit, especially ones used in or to make wine, can be substituted. Just add a little more vinegar to insure you get enough acid to relax the dough
6-8 inch long by 3/4 to 1 inch circumference cannoli forms aka your basic cannoli form size
Variations: The filling is YOUR choice! Anything you want to fill them with is perfectly fine, sweet or savory, or you can use the filling recipe provided – making whatever changes you want to it. Cannoli would make a great addition to a Thanksgiving dessert table/spread. In many Italian households, during the holidays, cannoli is always part of the dessert offerings. You could also make a Thanksgiving themed cannoli, like pumpkin cannoli (I came up with a great pumpkin filling recipe below) or apples, pecans, walnuts, any dried fruits etc. An idea to gussy up your cannoli is; dipping the rims of the shell in melted chocolate and rolling in chopped nuts or sprinkles, then letting them set prior to filling. Dipping or pressing mini chocolate chips into the filled ends OR just stirring mini chocolate chips into the filling prior to stacking or filling whatever shaped shells you come up with, is another great idea and makes a nice presentation The sky is the limit here, be creative! Naturally, if you have any dietary restrictions, by all means, go with it. I’ve provided a link to a gluten-free cannoli recipe and a slightly savory vegan cannoli recipe to help get you started.
Lidisano’s Cannoli
Makes 22-24 4-inch cannoli
Prep time:
Dough – 2 hours and 10-20 minutes, including resting time, and depending on whether you do it by hand or machine.
Filling – 5-10 minutes plus chilling time (about 2 hours or more)
Frying – 1-2 minutes per cannoli
Assemble – 20–30 minutes
RECIPE NOTE: THE EQUIVALENTS FROM THIS RECIPE WERE PREPARED USING THIS CONVERSION SITE: http://www.gourmetsleuth.com/index.asp.
CANNOLI SHELLS
2 cups (250 grams/8.82 ounces) all-purpose flour
2 tablespoons(28 grams/1 ounce) sugar
1 teaspoon (5 grams/0.06 ounces) unsweetened baking cocoa powder
1/2 teaspoon (1.15 grams/0.04 ounces) ground cinnamon
1/2 teaspoon (approx. 3 grams/0.11 ounces) salt
3 tablespoons (42 grams/1.5 ounces) vegetable or olive oil
1 teaspoon (5 grams/0.18 ounces) white wine vinegar
Approximately 1/2 cup (approx. 59 grams/approx. 4 fluid ounces/approx. 125 ml) sweet Marsala or any white or red wine you have on hand
1 large egg, separated (you will need the egg white but not the yolk)
Vegetable or any neutral oil for frying – about 2 quarts (8 cups/approx. 2 litres)
1/2 cup (approx. 62 grams/2 ounces) toasted, chopped pistachio nuts, mini chocolate chips/grated chocolate and/or candied or plain zests, fruits etc.. for garnish
Confectioners’ sugar
Note – If you want a chocolate cannoli dough, substitute a few tablespoons of the flour (about 25%) with a few tablespoons of dark, unsweetened cocoa powder (Dutch process) and a little more wine until you have a workable dough (Thanks to Audax).
CANNOLI FILLING
2 lbs (approx. 3.5 cups/approx. 1 kg/32 ounces) ricotta cheese, drained
1 2/3 cups cup (160 grams/6 ounces) confectioner’s sugar, (more or less, depending on how sweet you want it), sifted
1/2 teaspoon (1.15 grams/0.04 ounces) ground cinnamon
1 teaspoon (4 grams/0.15 ounces) pure vanilla extract or the beans from one vanilla bean
3 tablespoons (approx. 28 grams/approx. 1 ounce) finely chopped good quality chocolate of your choice
2 tablespoons (12 grams/0.42 ounces) of finely chopped, candied orange peel, or the grated zest of one small to medium orange
3 tablespoons (23 grams/0.81 ounce) toasted, finely chopped pistachios
Note – If you want chocolate ricotta filling, add a few tablespoons of dark, unsweetened cocoa powder to the above recipe, and thin it out with a few drops of warm water if too thick to pipe.
DIRECTIONS FOR SHELLS:
1. In the bowl of an electric stand mixer or food processor, combine the flour, sugar, cocoa, cinnamon, and salt. Stir in the oil, vinegar, and enough of the wine to make a soft dough. Turn the dough out onto a lightly floured surface and knead until smooth and well blended, about 2 minutes. Shape the dough into a ball. Cover with plastic wrap and let rest in the fridge from 2 hours to overnight.
2 Cut the dough into two pieces. Keep the remaining dough covered while you work. Lightly flour a large cutting or pastry board and roll the dough until super thin, about 1/16 to 1/8” thick (An area of about 13 inches by 18 inches should give you that). Cut out 3 to 5-inch circles (3-inch – small/medium; 4-inch – medium/large; 5-inch;- large. Your choice). Roll the cut out circle into an oval, rolling it larger and thinner if it’s shrunk a little.
3 Oil the outside of the cannoli tubes (You only have to do this once, as the oil from the deep fry will keep them well, uhh, oiled..lol). Roll a dough oval from the long side (If square, position like a diamond, and place tube/form on the corner closest to you, then roll) around each tube/form and dab a little egg white on the dough where the edges overlap. (Avoid getting egg white on the tube, or the pastry will stick to it.) Press well to seal. Set aside to let the egg white seal dry a little.
4. In a deep heavy saucepan, pour enough oil to reach a depth of 3 inches, or if using an electric deep-fryer, follow the manufacturer’s directions. Heat the oil to 375°F (190 °C) on a deep fry thermometer, or until a small piece of the dough or bread cube placed in the oil sizzles and browns in 1 minute. Have ready a tray or sheet pan lined with paper towels or paper bags.
5. Carefully lower a few of the cannoli tubes into the hot oil. Do not crowd the pan. Fry the shells until golden, about 2 minutes, turning them so that they brown evenly.
8. Lift a cannoli tube with a wire skimmer or large slotted spoon, out of the oil. Using tongs, grasp the cannoli tube at one end. Very carefully remove the cannoli tube with the open sides straight up and down so that the oil flows back into the pan. Place the tube on paper towels or bags to drain. Repeat with the remaining tubes. While they are still hot, grasp the tubes with a potholder and pull the cannoli shells off the tubes with a pair of tongs, or with your hand protected by an oven mitt or towel. Let the shells cool completely on the paper towels. Place shells on cooling rack until ready to fill.
9. Repeat making and frying the shells with the remaining dough. If you are reusing the cannoli tubes, let them cool before wrapping them in the dough.
DIRECTIONS FOR FILLING:
1. Line a strainer with cheesecloth. Place the ricotta in the strainer over a bowl, and cover with plastic wrap and a towel. Weight it down with a heavy can, and let the ricotta drain in the refrigerator for several hours to overnight.
2. In a bowl with electric mixer, beat ricotta until smooth and creamy. Beat in confectioner’s sugar, cinnamon, vanilla and blend until smooth. Transfer to another bowl and stir in chocolate, zest and nuts. Chill until firm.(The filling can be made up to 24 hours prior to filling the shells. Just cover and keep refrigerated).
ASSEMBLE THE CANNOLI:
1. When ready to serve..fill a pastry bag fitted with a 1/2-inch plain or star tip, or a ziplock bag, with the ricotta cream. If using a ziplock bag, cut about 1/2 inch off one corner. Insert the tip in the cannoli shell and squeeze gently until the shell is half filled. Turn the shell and fill the other side. You can also use a teaspoon to do this, although it’s messier and will take longer.
2. Press or dip cannoli in chopped pistachios, grated chocolate/mini chocolate chips, candied fruit or zest into the cream at each end. Dust with confectioner’s sugar and/or drizzles of melted chocolate if desired.
PUMPKIN FILLING
1/2 cup (123 grams/4.34 ounces) ricotta cheese, drained
1/2 cup (113 grams/4.04 ounces) mascarpone cheese
1/2 cup (122.5 grams/4.32 ounces) canned pumpkin, drained like ricotta
3/4 cup (75 grams/2.65 ounces) confectioner’s sugar, sifted
1/2 to 1 teaspoon (approx. 1.7 grams/approx. 0.06 ounces) pumpkin pie spice (taste)
1/2 teaspoon (approx. 2 grams/approx. 0.08 ounces) pure vanilla extract
6-8 cannoli shells
1. In a bowl with electric mixer, beat ricotta and mascarpone until smooth and creamy. Beat in confectioner’s sugar, pumpkin, pumpkin pie spice, vanilla and blend until smooth. Transfer to another bowl, cover and chill until it firms up a bit. (The filling can be made up to 24 hours prior to filling the shells. Just cover and keep refrigerated).
2. Fill the shells as directed above. I dipped the ends of the shells in caramelized sugar and rolled them in toasted, chopped pecans.
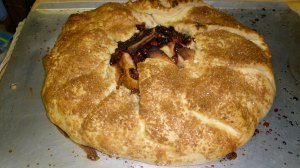
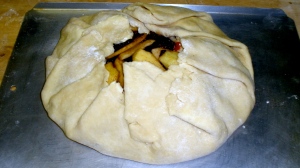
While using up all my apples from apple picking, I also made an apple cranberry galette. I’ve made cakes, pies and puff pastries, but never a galette. I also never realized just how easy it was to make! Basically, a galette is a free-form open-faced rustic tart, according to the Oxford Companion to American Food and Drink. So if you’re not into making pies or tarts you can just make the dough and wrap your filling in it, free-form. I made mine using a basic pate brisee and using it to wrap my apple-cranberry filling. I love the flavors of apple & cranberry together, so I’ve been using them a lot! Plus, I think pies are a much better vehicle for the lovely cranberry instead of that weird jelly cranberry sauce that’s always present a the Thanksgiving dinner table.
Apple-Cranberry Galette
Ingredients:
- 1 pound unsalted butter
- 1 pound all purpose flour
- 1/2 pound cake flour
- 1 teaspoon salt
- 1/2 teaspoon baking powder (optional)
- 6 ounces cold water
- 6 granny smith apples
- juice of 1 lemon
- 6 ounces of dried cranberries
- 1/2 teaspoon of cinnamon
- 1/4 teaspoon clove
- 1/4 teaspoon nutmeg
- 1 teaspoon vanilla extract
- pinch salt
- 1/4 cup heavy cream
- 1/4 cup brown sugar
- 1/4 coarse brown sugar such as demarara sugar
Make the pate brisee:
- Cut the butter into 1 inch pieces and reserve in the refrigerator to keep it cold.
- In a large bowl, combine the flours, salt and baking powder, if using.
- Rub butter in by hand, until you have cranberry size pieces of butter in the flour.
- Stir in cold water, until dough comes together.
- Scrape dough out of bowl, split in half and shape into two, 3 inch thick cylinders. Wrap in plastic wrap and chill until firm, at leas 30 minutes.
Make the Apple-Cranberry filling:
- In a medium bowl, combine the apples, lemon juice, cranberries, cinnamon, clove, nutmeg, vanilla, salt and sugar. Toss to combine all the spices with the apples. Allow to sit for 30 minutes.
- Meanwhile, roll out pate brisee until it is about 1/4 to 1/2 inch thick. Place the dough onto a flat cookie sheet. Pre-heat oven to 350 degrees.
- Toss all of the apple mixture into the center of the dough. Wrap the dough around the apples, making sure the apples are mostly covered, but there is still an opening in the center. Don’t worry about making it super pretty–it’s supposed to be rustic!
- Brush with heavy cream. Sprinkle with demarara sugar.
- Bake for 45 minutes, or until golden brown.
To serve, slice as you would a pie and top with ice cream or whipped cream if desired.
My First Ever Apple Cake!
Posted on: November 22, 2009
A few weeks ago, I went apple picking with my boyfriend. Of course, I decided to try a bunch of apple recipes so that I can find a way to use all 18 pounds of apples I had! (I also had apples as snacks a LOT!) I made apple-cranberry butter, I made an apple-cranberry galette, and I made apple cake! I know apple cake is a popular thing, but I have to admit, I’ve never heard of it or even made it until recently. I really thought cooked apples were only common components in pies or in turnovers. I was glad to see I could try something new with the apples and that it was easy to make!
Apple Cake, Adapted from the 1975 edition of The Joy of Cooking
Ingredients:
- 5 to 6 cups pared, cored and sliced tart apples (I used 8 medium sized apples.)
- 1/4 cup butter
- 1/2 cup sour cream
- zest and juice of 1 lemon
- 1 cup sugar
- 2 tablespoon all-purpose flour
- 8 beaten egg yolks
- 8 egg whites
- 1/4 cup sugar
- 1 tablespoon cinnamon
- 1/4 cup dry breadcrumbs
- 3/4 cup shredded, blanched almonds, divided
- 1 standard angel food cake pan
- In a large pan over medium high heat, add butter and melt. Add apples and cook until tender. Do not allow apples to brown. Turn heat down to low.
- In a large bowl, combine sour cream, lemon juice, lemon zest, sugar, flour, egg yolks and 1/3 cup almonds. Pour the contents of the bowl over the cooked apples and stir over low heat, until mixture has thickened. Cool mixture.
- Pre-heat oven to 325 degrees. Grease the angel food cake pan and line with flour.
- In the bowl of a stand mixer, or another large bowl if using a hand-held mixer, add egg whites and beat until stiff peaks form.
- Fold egg whites into the apple mixture. In small bowl, combine sugar, cinnamon, bread crumbs, and remaining almonds.
- Pour apple mixture into cake pan. Sprinkle with sugar mixture.
- Bake 45 minutes or until firm. Serve cold with whipped cream of vanilla ice cream.
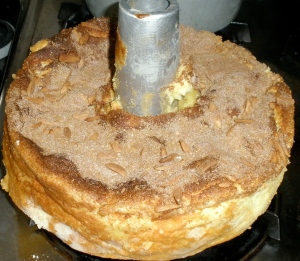
The cake was pretty & not too sweet! I loved the cinnamon on top and the almonds added great texture. I thought the recipe was a bit odd, but I’m glad it worked. Unfortunately, it seemed to deflate a bit when I took it out. I know the leavening depended on the meringue, but it was sad to see it lose its height. Anyone know how I can fix this? Either way, I think this one is definitely a keeper!
Last weekend, I managed to find one farm in Upstate New York where they were still open for apple picking! It was the first time I ever went and it was great! It was a nice day–sunny and not too chilly. My boyfriend & I came home with a huge bag each of a variety of apples. We brought back golden delicious, granny smith macintosh, red delicious and some other varieties I had only seen in the farmer’s markets. Of course I also had to get some sugar pumpkins so that I could try my hand at some new pumpkin recipes.
Of course, my first thoughts of things to do with the apples were apple pie and apple turnovers. But I thought I’d try something different so I decided to make some apple butter. If you’ve never had apple butter, I highly recommend it! It’s sweet & tart and delicious. It’s like an apple jam that’s a great accompaniment to toast, a bagel or even on the side of some pancakes. My recipe is a bit different though since I also added dried cranberries for some extra tartness. I also cooked this in my slow cooker so it was really easy. If any of you try this, let me know what you think!
Apple-Cranberry Butter Yield: 64 ounces
Ingredients:
- 5 1/2 to 6 pounds apples, peeled, cored and chopped (I used a variety of macintosh, granny smith and red delicious.)
- 6 ounces dried cranberries
- 1 1/2 teaspoon ground cinnamon
- 1/4 teaspoon clove
- 1/4 teaspoon salt
- 1/4 cup maple syrup
- 1/4 cup brown sugar
- 1/4 teaspoon nutmeg
- 1/4 teaspoon allspice
- In the bowl of your slow cooker or crock pot, (mine was 5 quart, but a bigger one would probably be better) add apples, cranberries, cinnamon, clover, salt, syrup, sugar, nutmeg, and allspice. (If all the apples don’t fit, just add as many as you can with the seasonings then add more as they cook down.)
- Stir to combine.
- Place slow cooker on low for 8-10 hours, until all the apples are cooked down and thickened.
- Use an immersion blender to remove any remaining lumps. Or you can also do process it in your food processor or blender, in batches.
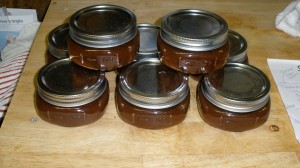
- You can preserve these in cans so you can have apple butter throughout the winter or you can also freeze it to store it.
Pumpkin Butter Yield: about 20 ounces
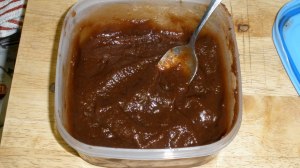
Pumpkin butter, like apple butter is sweet and delicious! It’s a great way to use up any pumpkin puree you may have or even some sugar pumpkins you just got from the pumpkin patch! I used the pumpkins I bought from the farm’s shop when I went apple picking.
- 1 medium-sized sugar pumpkin, seeds removed or about 4 cups of pumpkin puree
- 1 inch fresh ginger, grated
- 3/4 cup brown sugar
- 1/2 cup maple syrup
- 1 teaspoon cinnamon
- 1/2 teaspoon nutmeg
- 1/2 teaspoon ground clove
- 1/4 cup bourbon (optional)
- 1/2 cup apple cider
- pinch salt
- Pre-heat oven to 350 degrees.
- Slice pumpkin in half. Remove seeds and membranes from pumpkin. (Reserve seeds for roasting, if desired.)
- Place pumpkin halves in oven, flesh side down. Roast for 45 minutes or until fork tender. Cool.
- Scoop out pumpkin flesh and place in bowl of slow cooker.
- Add ginger, brown sugar, maple syrup, cinnamon, nutmeg, clove, apple cider, salt and bourbon.
- Stir all ingredients together to combine.
- Cook on low for 2 hours until thickened and reduced. The best way to store this would be to freeze it as pumpkin does not can well.
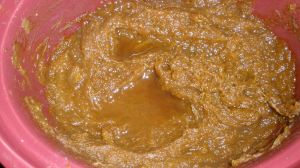
And what did I do with the rest of my pumpkin? Well I made a pumpkin cheesecake of course! I used a recipe from Pick-Your-Own and it turned out delicious! I will note however that I ended up with enough batter for two cheesecakes, which really isn’t too much of a problem once you taste this stuff! Also, be sure to bake it in a water bath. Please! And at a lower temperature–say about 300 degrees. I baked it without a water bath, at 350 degrees, and the tops cracked and the texture was a bit gritty. I think with gentler cooking both of these minor issues can be averted. I will definitely be trying this again soon, once the cakes are both gone. So far, I made this last night and as of today, one is already gone! It really is a great recipe!

- In: Cooking | Personal
- 2 Comments
I love the fall! Autumn has so many great foods that are so versatile and delicious. Of course summer fruits and vegetables are great too, but I just love the unique tastes that come from the different autumn foods. One of my favorites is the pumpkin which is delicious savory or sweet. I also love squash! I know, I know it’s weird. But squash is easy to make, delicious and versatile. The other day I came home with a shopping bag full of squash that I used to make soup. I also had the acorn squash as a simple side, roasted with butter, maple syrup and brown sugar. I then filled the squash with some cooked onions and pecans for texture. Of course with my different kitchen experiments, I tend to have to plan and shop for ingredients, but this time I wanted to re-use that delicious acorn squash to make ravioli. These ravioli were not easy to make, but they were delicious and hearty! I recommend taking some time one day to make some fresh ravioli–it will really change your world!
Yield about 28, 2 1/2 inch ravioli
To Make the Ravioli you need to start with 11 ounces of flour and 3 eggs. Make a well with the flour and beat the eggs into the well. Using a fork slowly incorporate the eggs into the flour until you’ve incorporated most of the eggs. Use a bench scraper to start kneading the dough. Once the dough has come together, wrap in plastic wrap and allow to rest for at least 30 minutes. After the dough has rested, cut it into four pieces using a bench scraper. Roll one piece of the dough until thin enough to pass through a pasta roller. Follow directions for your pasta machine to roll out the dough and use either a ravioli mold, a ravioli stamp to shape the ravioli. You can also cut them by hand.
Acorn squash ravioli filling Ingredients:
- 1 roasted acorn squash
- 1 tablespoons butter
- 2 tablespoons maple syrup
- 2 tablespoons brown sugar
- 1/2 sliced onion
- 1/3-1/2 cup chopped pecans
- 8 ounces ricotta cheese, strained
- 1/4 teaspoon nutmeg
- salt and pepper to taste
- 1/2 stick butter (2 ounces)
- 2 tablespoons fresh sage leaves, chopped
- 1/4 cup pecans, chopped
- Pre-heat your oven to 350 degrees. Slice the acorn squash in half and remove the seeds and membranes.
- Rub the butter along the inside of the squash and sprinkle the brown sugar inside. Add the maple syrup. Roast for 45 minutes to an hour, until fork tender. Allow to cool.
- Meanwhile, place ricotta cheese into a sieve, lined with cheese cloth and allow to strain. Squeeze to remove as much water as possible. Note, if your ricotta cheese is already very thick and creamy, you can probably skip this step.
- In a large pan, over medium heat, add liquid from squash and add onion and pecans. Cook until reduced and onions have softened, about 6 to 8 minutes.
- In the bowl of a food processor, scrape the acorn squash and add the onion and pecans. Add the strained ricotta cheese and pulse until combined.
- Fold in nutmeg, salt and pepper to taste.
- Place filling into a pastry bag to fill ravioli.
- Meanwhile, place a large pot of water to boil with salt.
- In a large pan, over medium heat melt butter. Once water is boiling add ravioli, working in batches of 8.
- With a spider or slotted spoon, remove ravioli and add to melted butter. Add sage leaves and pecans, and cook for 3-4 minutes more, until all ravioli are coated and sage is fragrant.
One thing that I’m able to do really well since culinary school is make a kick-ass pot of soup. I was able to make soups before, but they didn’t have the depth of flavor and rich texture that my soups have now. And, I’m able to adapt many soup recipes to a variety of different dietary needs. For example, if you want this soup to be vegetarian use water or vegetable stock instead of chicken stock or broth. If you want to make it vegan, substitute the butter for olive oil, taking care to ensure your oil doesn’t reach its smoke point. With the nip in the air today, I thought this soup would be perfect to warm me up and would still incorporate great autumn flavors.
Roasted Butternut Squash Yield: 6 to 8 (8 ounce) servings
Ingredients:
- 2 large butternut squash, peeled and chopped roughly, seeds removed
- 4 tablespoons olive oil
- salt and freshly ground pepper to taste
- 4 tablespoons butter
- 1/2 large onion, diced
- 1 carrot, peeled and diced
- 1 celery stalk, diced
- 2 ounces flour
- 40 ounces low-sodium chicken broth (you can substitute water or vegetable stock)
- 1 bay leaf
- salt and freshly ground white pepper
- 6 slices whole grain bread, cut into cubes
- 4 tablespoons butter
- 4 fresh sage leaves, minced
- Pre-heat the oven to 350 degrees. Place the butternut squash on a sheet pan and toss with olive oil, salt and pepper. Place in oven for 45 minutes to one hour, until tender. Remove from oven and reserve.
- In a large, deep pot, over medium-high heat, add butter onion, carrot and celery and cook until softened, about 5 or 6 minutes.
- Whisk in flour and cook 2 minutes more.
- Slowly whisk in stock or water.
- Add roasted squash, bay leaf, salt and white pepper. Bring to a boil over high heat, then reduce to a simmer. Stir occasionally to make sure nothing sticks. Simmer for about 10-15 minutes.
- Meanwhile, make the croutons. In a large pan over medium-high heat, melt the rest of the butter. Toss in the bread and the sage leaves until toasted. Season with salt and pepper and reserve.
- Once the squash has broken down, remove the pot from the stove and purée the soup in batches either in the food processor or blender. (You can also use a food mill with the medium plate.)
- Return the soup to a simmer and adjust seasoning, if necessary. To serve, ladle into a warmed bowl and top with 5-6 toasted croutons.


